Overview
This project enables your microcontroller to communicate in real time to a web browser.
I started this project after seeing a similar implementation on hackaday from mbed.org. Their implementation uses their own device, the mbed Cortex-M0 beta. I've been a hobbyist microchip PIC developer for a few years, so I set out to write my own version for microchip's 8bit pic devices in C.
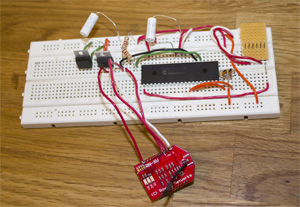
The microcontroller used is a microchip PIC18F4620. Originally I started this project on a PIC16F886. The 16F886 wasn't really ideal considering its lack of ram wasn't sufficient for dealing with strings (368 bytes). The 18F4620 has a much more healthy 3,968 bytes of ram.
The wifi module used is a Roving Networks RN-XV.
My dev board:
About Websockets
WebSockets is a new protocol of being standardized by the IETF. Most modern browsers now feature a websocket client. The fact that it's a bi-directional protocal supported by browsers makes it ideal for control applications. They do a great job explaining its applications over at mbed.org.
The client: mbed.org implements a relatively old version of websockets. I've gone ahead and used version 13 according to the draft available at ietf.org.
The server: I wanted to run my own custom server, so I took a look at wiki's Comparison of WebSocket Implementations and chose to use Autobahn for my server software. Autobahn supports the latest protocol versions and seems to be a highly maintained project.
Communication Model
For control applications the server needs to function like this:
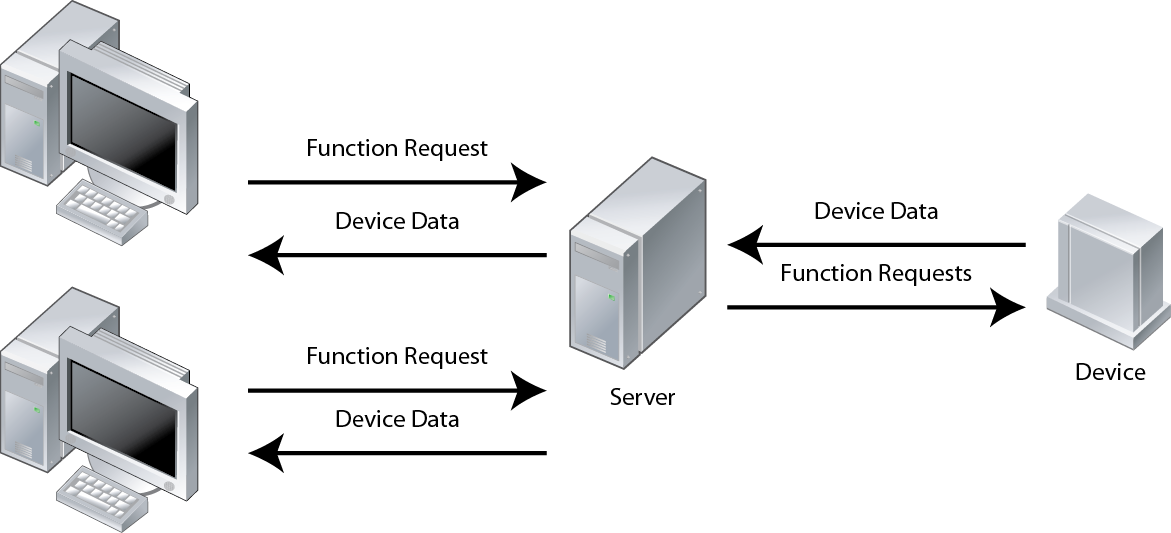
The device broadcasts to all browsers, the browsers only talks to the device
The Server
The server used is Autobahn. It's a python server.
To accomplish the model described above I modified their example available here.
The server identifies the device by its static IP. Ideally it would identify it by a user-agent tag in the header. I'm no python expert so I wasn't sure how to accomplish this.
import sys
from twisted.internet import reactor
from twisted.python import log
from autobahn.websocket import WebSocketServerFactory, WebSocketServerProtocol


class BroadcastServerProtocol(WebSocketServerProtocol):
    def onOpen(self):
        self.factory.register(self)

    def onMessage(self, msg, binary):
        if not binary:
            if self.peer.host == "192.168.1.210":
                self.factory.hostbroadcast(msg)
            else:
                self.factory.userbroadcast(msg)

    def connectionLost(self, reason):
        WebSocketServerProtocol.connectionLost(self, reason)
        self.factory.unregister(self)


class BroadcastServerFactory(WebSocketServerFactory):

    protocol = BroadcastServerProtocol

    def __init__(self):
        WebSocketServerFactory.__init__(self, debug=True)
        self.echoCloseCodeReason = True;
        self.clients = []
        self.tickcount = 0

    def register(self, client):
        if not client in self.clients:
            print "registered client " + client.peerstr
            self.clients.append(client)

    def unregister(self, client):
        if client in self.clients:
            print "unregistered client " + client.peerstr
            self.clients.remove(client)

    def userbroadcast(self, msg):
        print "user sending message to device: '%s'" % msg
        for c in self.clients:
            if c.peer.host == "192.168.1.210":
                c.sendMessage(msg)

    def hostbroadcast(self, msg):
        print "device sending message to all users: '%s'" % msg
        for c in self.clients:
            if c.peer.host != "192.168.1.210":
                print "\tsend to " + c.peer.host
                c.sendMessage(msg)


if __name__ == '__main__':

    log.startLogging(sys.stdout)
    factory = BroadcastServerFactory()
    reactor.listenTCP(9000, factory)
    reactor.run()
The server is in debug mode and will print the headers received and sent to help debug your device. To dissable debug mode simply remove "debug=True" from WebSocketServerFactory's init.
The port is set in main. It's set to 9000 in this example.
The Clients
Web Browsers
To test my device I'm going to use the same example found for autobahn's tutorial.
<html>
   <head>
      <script type="text/javascript">
         window.onload = function() {

            var ws_uri = "ws://192.168.1.201:9000";

            if ("WebSocket" in window) {
               webSocket = new WebSocket(ws_uri);
            }
            else {
               // Firefox 7/8 currently prefixes the WebSocket object
               webSocket = new MozWebSocket(ws_uri);
            }

            webSocket.onmessage = function(e) {
               console.log("Got echo: " + e.data);
            }
         }
      </script>
   </head>
   <body>
      <h1>Autobahn WebSockets Echo Test</h1>
      <button onclick='webSocket.send("Hello, world!");'>Send Hello</button>
   </body>
</html>
Use the appropriate ip/port.
The Microcontroller
The meat of my project!
The C code is available here
Compiled using Hi-Tech C Pro18.
What it does is seen here in main.c:
while (1)
{
    while(!wifly_connect(_IP, _PORT)){}
    //send header
    //check for accepting protocal upgrade
    if (!websocket_open()) {wifly_closeconn(); continue;}

    while(wifly.conn_open)
    {
        // check for connection close
        if (wifly_chkclose()) break;

        // read in websocket data
        if (websocket_recpacket())
        {
            sprintf(message, "Wifly + 18F4620 received: \"%s\"\n", websocket.receiver);
            websocket_sendpacket(message); //echo it back
        }
    }
}
The device polls for new Websocket data. If it receives new data, it echos it back prefixed with "Wifly + 18F4620 received: ".
The Protocol
I'd like to explain the major difference with websocket version 13, and how to implement your own client.
After you've made a TCP socket connection to the server, you have to start the handshake process by sending a Header that looks very much like HTTP. The following is the most basic header allowed by the protocol:
GET / HTTP/1.1
Host: server.example.com
Upgrade: websocket
Connection: Upgrade
Sec-WebSocket-Key: dGhlIHNhbXBsZSBub25jZQ==
Sec-WebSocket-Version: 13
Note: Every line has to be terminated with a carriage return, and a new line "\r\n". The last line has two "\r\n\r\n".
The GET statement is followed by the directory you're requesting. For example, the URI "ws://192.168.1.201:9000/cake" would require the get statement "GET /cake HTTP/1.1". Autobahn doesn't currently support get directories at the time of writing.
The Host statement is followed by the host address of the server you wish to connect to.
Here's the big different with the handshake in newer websocket versions, the Key. The key should be a randomly generated 16 byte base64-encoded string. The server response needs to be checked for Sec-WebSocket-Accept header field containing the correct encoded key.
According to the draft, this key is the random key sent from the client concatenated with "258EAFA5-E914-47DA-95CA-C5AB0DC85B11", then SHA-1 Hashed, then base64-encoded.
I didn't want to implement SHA-1 on my microcontroller, so I'm sticking with a static Key. To generate your own expected response, you can use this PHP script.
<?PHP
$userkey = "dGhlIHNhbXBsZSBub25jZQ==";
$serverkey = "258EAFA5-E914-47DA-95CA-C5AB0DC85B11";

$tohash = $userkey . $serverkey;
$raw_key = sha1($tohash, true);

$base64key = base64_encode($raw_key);
print $base64key . "\n";
?>
This prints "s3pPLMBiTxaQ9kYGzzhZRbK+xOo="
The server should respond to that header handshake request with:
HTTP/1.1 101 Switching Protocols
Upgrade: websocket
Connection: Upgrade
Sec-WebSocket-Accept: s3pPLMBiTxaQ9kYGzzhZRbK+xOo=
Sending Data
Client to server communication is required to be masked.
The payload sent by the client should look like this series of bytes:
// to send "cake"
0x81 // indicates there's only one payload, indicates we're sending text
0x12 0xA0 0xFC 0x32 // four randomly generated bytes (mask)
0x04 // the length of the payload data (text)
0x71 // 'c'(0x63) XOR 0x12 (character XOR mask at [string_character_index % 4])
0xC1 // 'a'(0x61) XOR 0xA0 (character XOR mask at [string_character_index % 4])
0x97 // 'k'(0x6b) XOR 0xFC (character XOR mask at [string_character_index % 4])
0x57 // 'e'(0x65) XOR 0x32 (character XOR mask at [string_character_index % 4])
Receiving Data
Server to client communication is not masked.
The payload received from the server sending 'cake'
// to receive "cake"
0x81 // indicates there's only one payload, indicates we're receiving text
0x04 // the length of the payload data (text)
0x63 // 'c'(0x63)
0x61 // 'a'(0x61)
0x6b // 'k'(0x6b)
0x65 // 'e'(0x65)
Demo
Does it work?
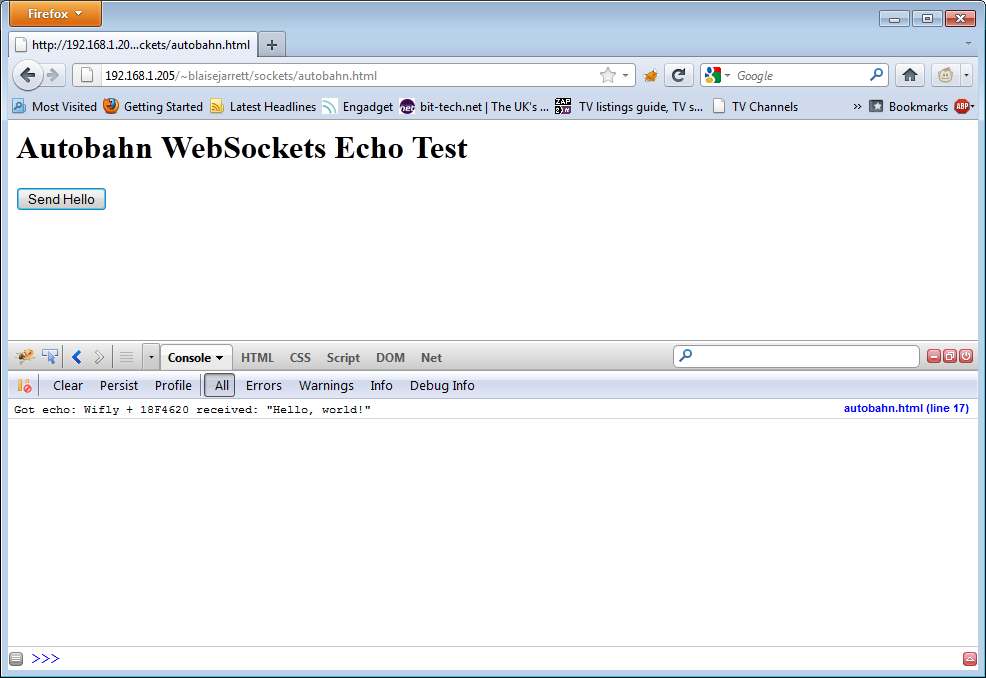
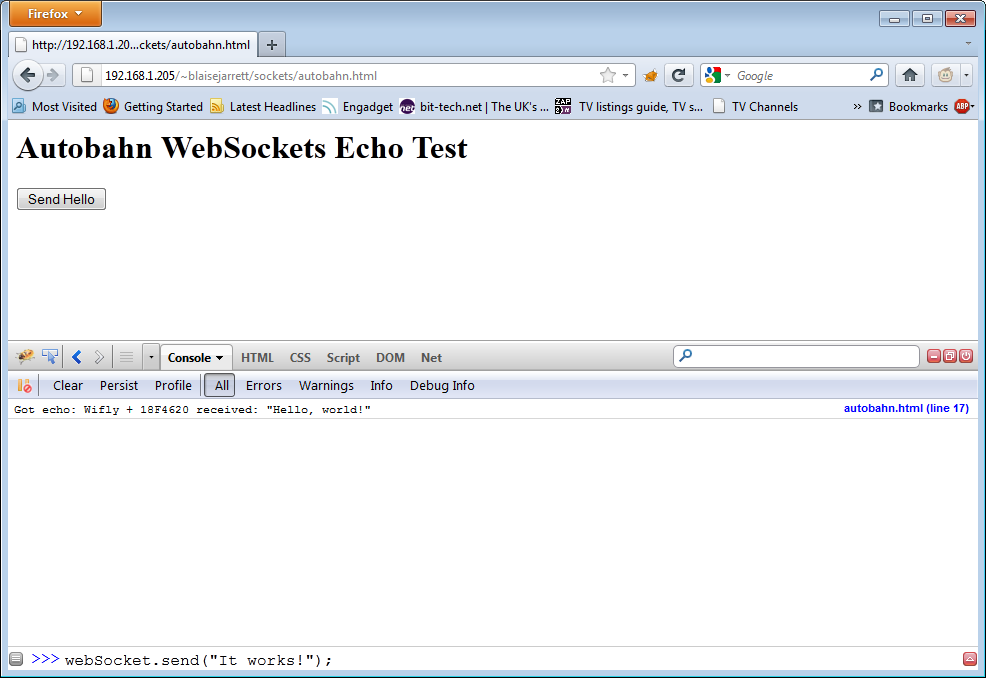
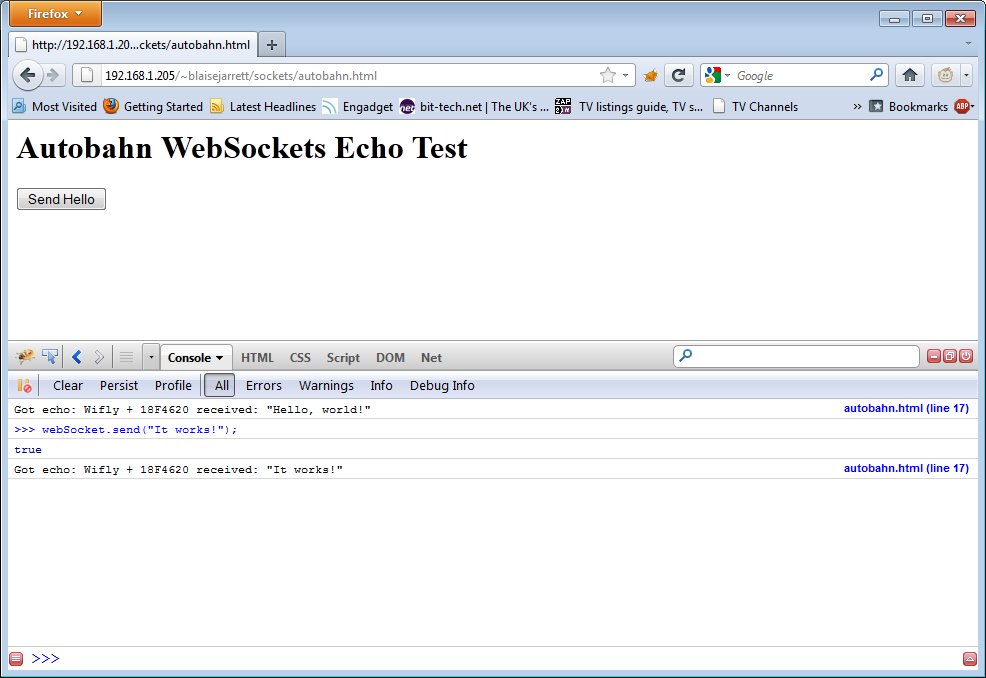
Yes, Yes it does.
The device instantly echoes back the web browser's websocket transmission.
We have a bi-directional communication channel between our microcontroller and web browser.
To provide a better demonstration I've hooked up a potentiometer to gather, and transmit live data, and an LED to demonstrate receiving data.
The microcontroller sends the data to the browser in JSON format to be easily interpreted.
In the future I'll be using this to build control devices of interest, such as a wifi power strip that gathers power consumption data in real time.